Cheat Sheet
This is a quick “cheat sheet” for myself…
- Separate page for Ubuntu LTS setup…
- Separate page for Windows setup…
- Separate page for Windows Scripts…
- Separate page for Ubuntu LTS setup on Raspberry Pi 5…
- Separate page for docker…
- Separate page for OpenSSL, TLS and PKI Certificates…
- Other stuff as “backups”:
- Firefox
- Block Origin “My Filters” (note: private page)
- OnChrome URL Patterns (note: private page)
- Nintendo Switch Cheats and Hacks (note: private page)
- CPanel Generic Global Email Filters (note: private page)
- Mobile Phones (note: private page)
- pfSense Settings (note: private page)
- “To Do” List (note: private page)
Regular Expressions (Regex)
- inverse match (i.e. match only when substring not found
((?!<substring>).)*
Windows (GUI)
- Taskbar:
- %APPDATA%\Microsoft\Internet Explorer\Quick Launch\User Pinned\TaskBar
Windows Troubleshooting and Safe Mode
- to reboot into “Windows Safe Mode”:
- use either of the two methods:
- while holding the
Shiftkey on the keyboard, if logged in, click the “Power” icon in the “Start” menu, or on the sign-in screen and select “Restart”- keep holding
Shiftuntil the computer restarts to the “Choose an Option” screen
- keep holding
- hold F8 during BIOS/UEFI loading
- while holding the
- use either of the two methods:
-
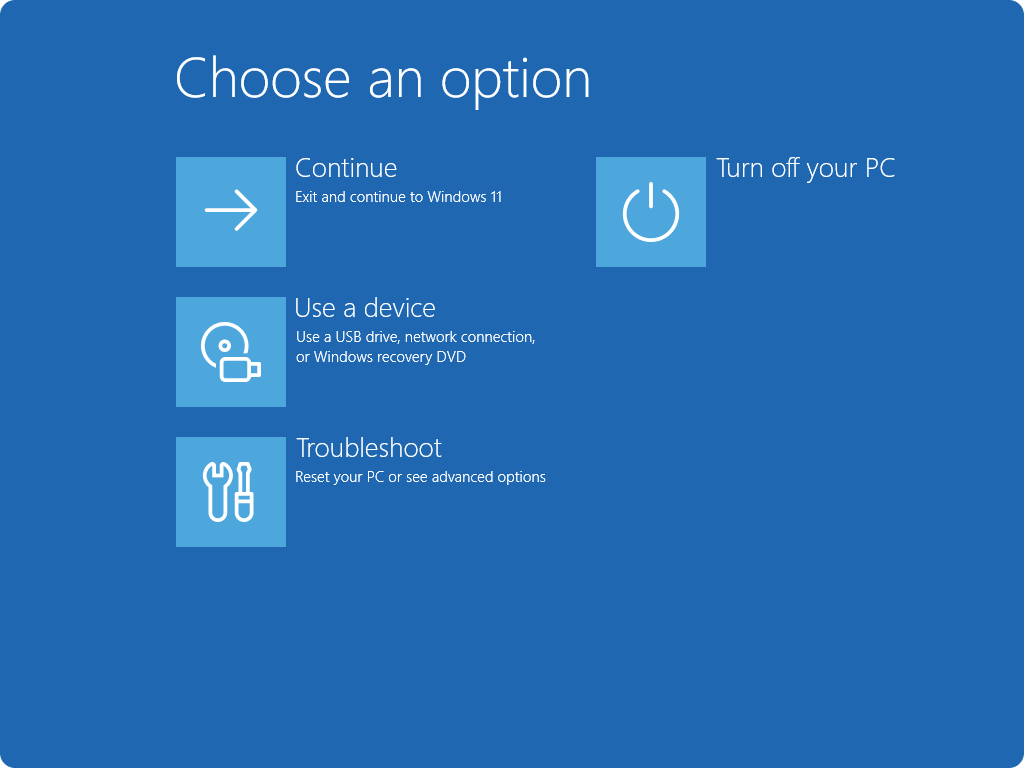
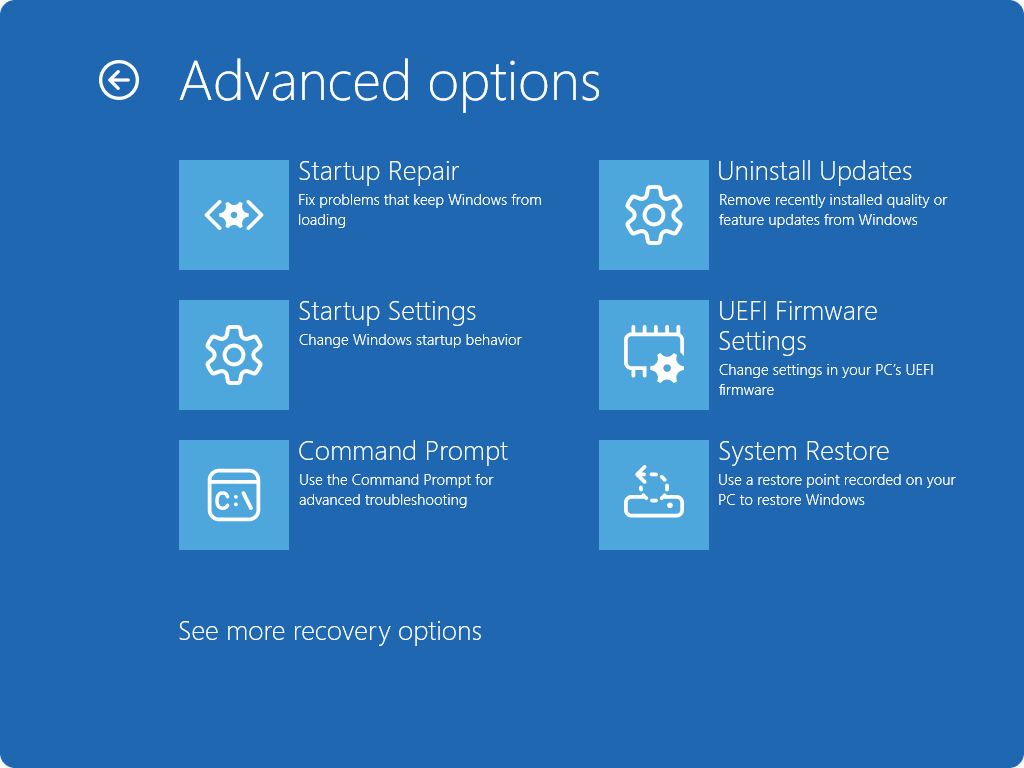
- starting from the “Choose an option” screen
- starting from the “Choose an option” screen
-
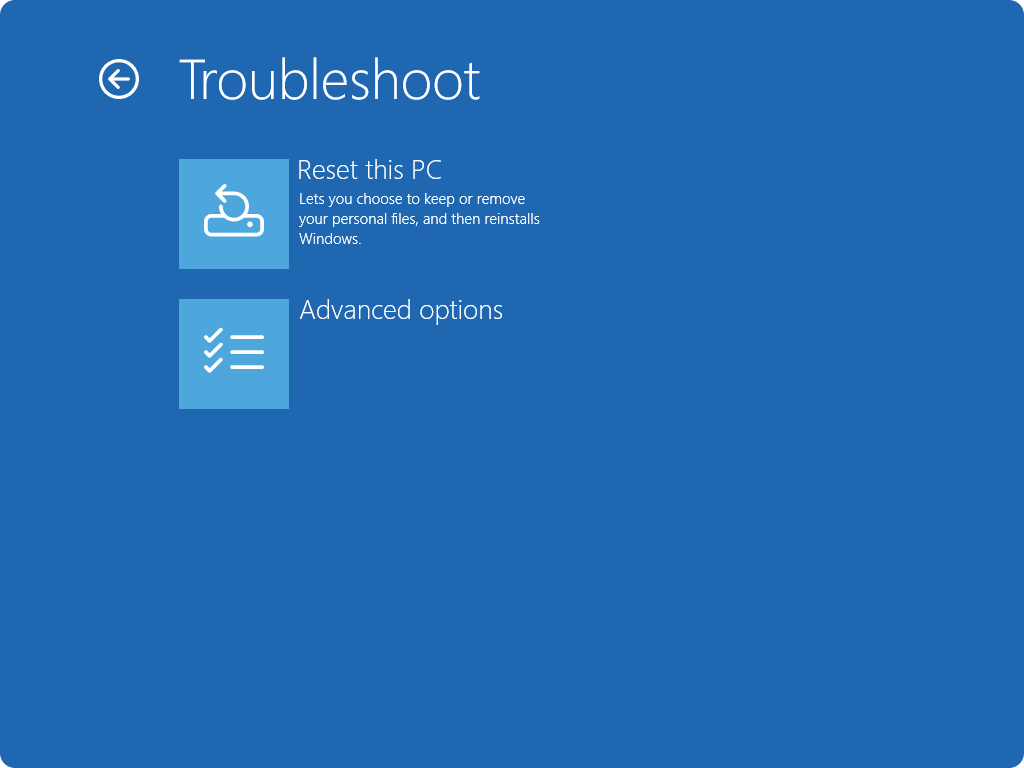
- select “Troubleshoot”
- select “Troubleshoot”
-
- select “Advanced Options”
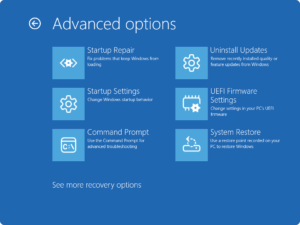
- select “Advanced Options”
-
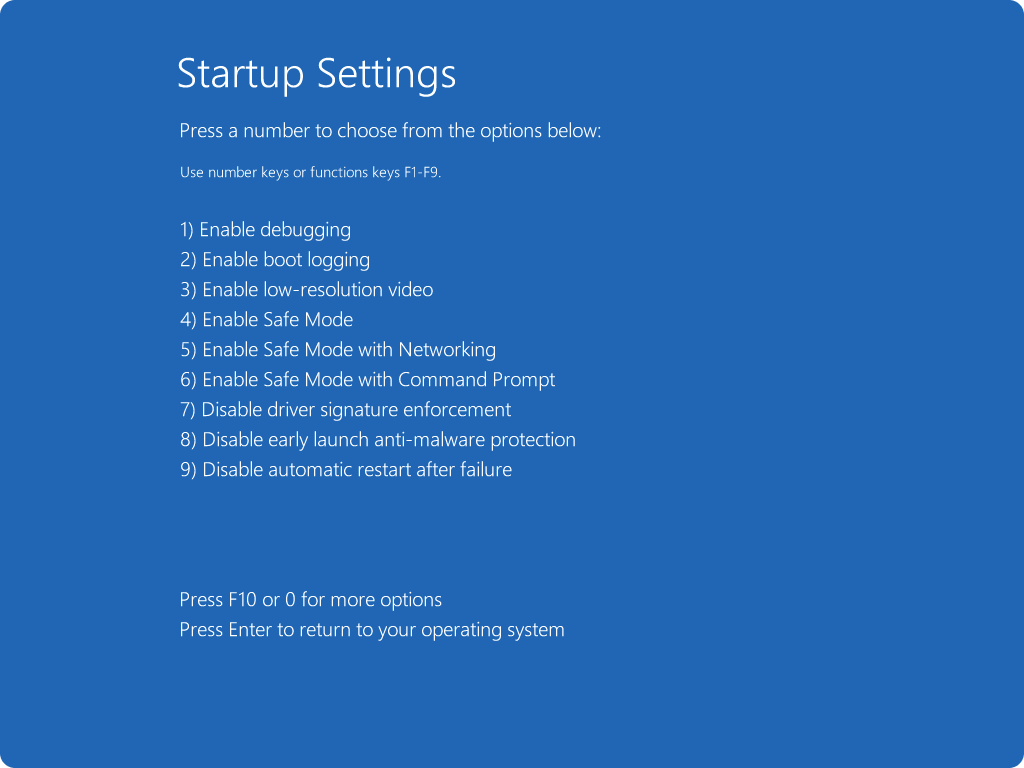
- select the appropriate option (e.g. “Safe Mode” or “Command Prompt”) as required
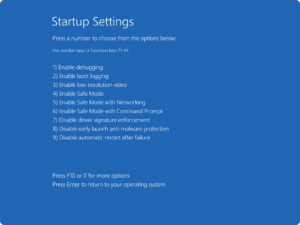
- select the appropriate option (e.g. “Safe Mode” or “Command Prompt”) as required
- removing drivers manually:
- get all driver’s installation references (i.e.
.inffile):- run:
dism /online /Get-Drivers /Format:Table
- run:
- remove the offending
.inffile/s- run:
pnputil /delete-driver oemXX.inf /uninstall /forcewhere XX are the .inf sources for the offending drivers
- run:
- get all driver’s installation references (i.e.
Windows Shell/Command Prompt
Rebooting, Shutting Down
- reboot:
- from an elevated command prompt, execute
shutdown /r /t 1
- from an elevated command prompt, execute
- reboot to UEFI:
- from an elevated command prompt, execute
shutdown /r /o /t 1
- from an elevated command prompt, execute
- shutdown:
- from an elevated command prompt, execute
shutdown /s /t 1
- from an elevated command prompt, execute
Search
- find specifically named files containing a specific string
findstr /s /i /m /c:"<string>" "<pattern>"
- delete all files of a specific name/pattern in current and any sub-directories (without confirmation)
del /S /Q "<pattern>"
- protect all files of specific names/patterns in current and any sub-directories
for /R . %%I IN (<pattern>) do attrib +R "%%I"
WMIC and CIM
- with WMIC already deprecated, using CIM is your only choice; the easiest way to transition to PowerShell scripts using the
Get-CimInstancecommand is to find out whichWin32_*CIM object the WMIC aliases use by running:wmic alias list brief- click here for the list of aliases off a Windows 11 machine
- the CIM replacement being:
Get-CimInstance -ClassName Win32_<*>where theWin32_*object is from the WMIC alias list
Network Shares
- figure out which shares are connected using what credentials
- using
wmic:wmic netuse where LocalName="<share>" get UserName /value
- alternatively, since WMIC is already deprecated as stated above, using the “new” PowerShell:
Get-CimInstance -ClassName Win32_NetworkConnection | Where-Object {$_.LocalName -like "<map>"} | Select-Object {$_.UserName}- where
<map>is the mapped path, like “Z:”
- where
- using
Windows Services
- printing the entire list of services (mind the spaces between the ‘
=‘ and “all” text)sc queryex type= all state= all
Access Control Lists (ACLs)
- Resetting ACLs for entire directories (assuming: 1. administrator command prompt and 2. reset to inherit ACL from parent)
icacls <path> /reset /t /c /l /q
Mounting ext4 Partitions
- advised to use Ext2FSD (updated fork here) unless unable to (e.g. corporate/controlled laptop/desktop)
- in an administrator-level command prompt or PowerShell session:
- list the bare devices
wmic diskdrive list brief
- mount the entire device under WSL
wsl --mount \\.\PHYSICALDRIVEx --bare
- list the bare devices
- in an administrator-level WSL session:
- create mount point if not already existing
mkdir -p /mnt/tmp
- check the partition to mount
lsblk(look for/dev/sdxN)
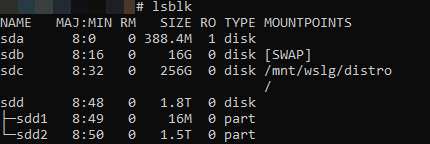
- mount the partition
mount /dev/sdxN /mnt/tmp
- create mount point if not already existing
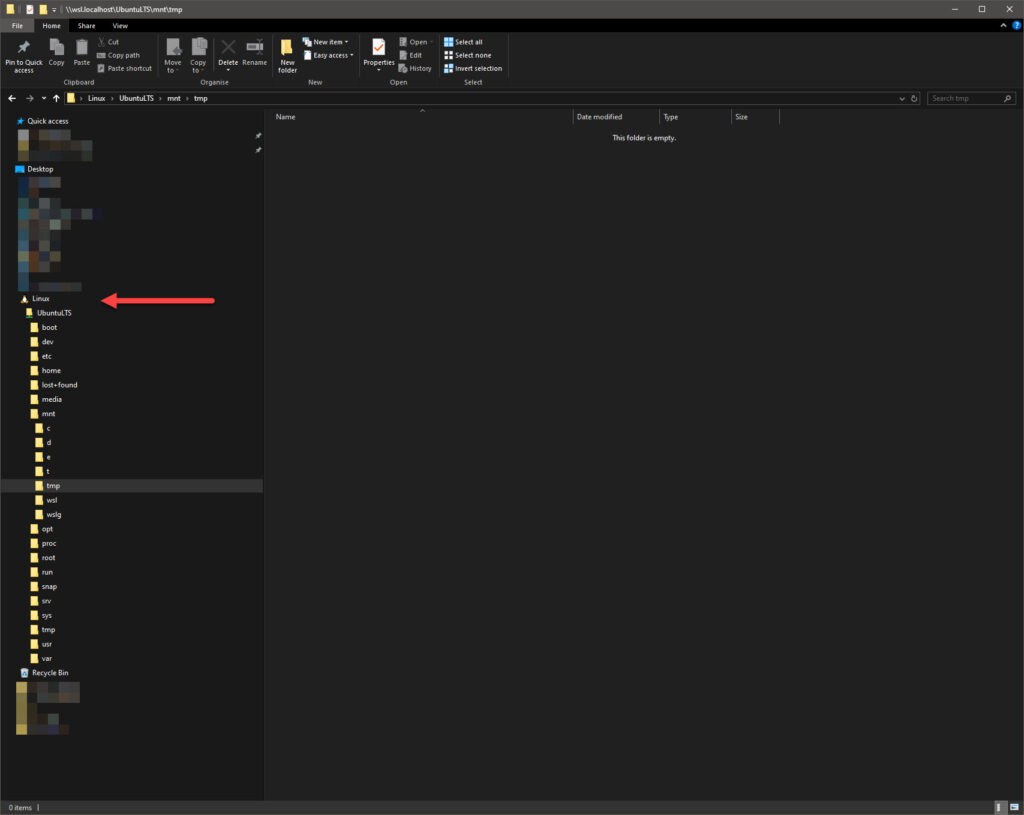
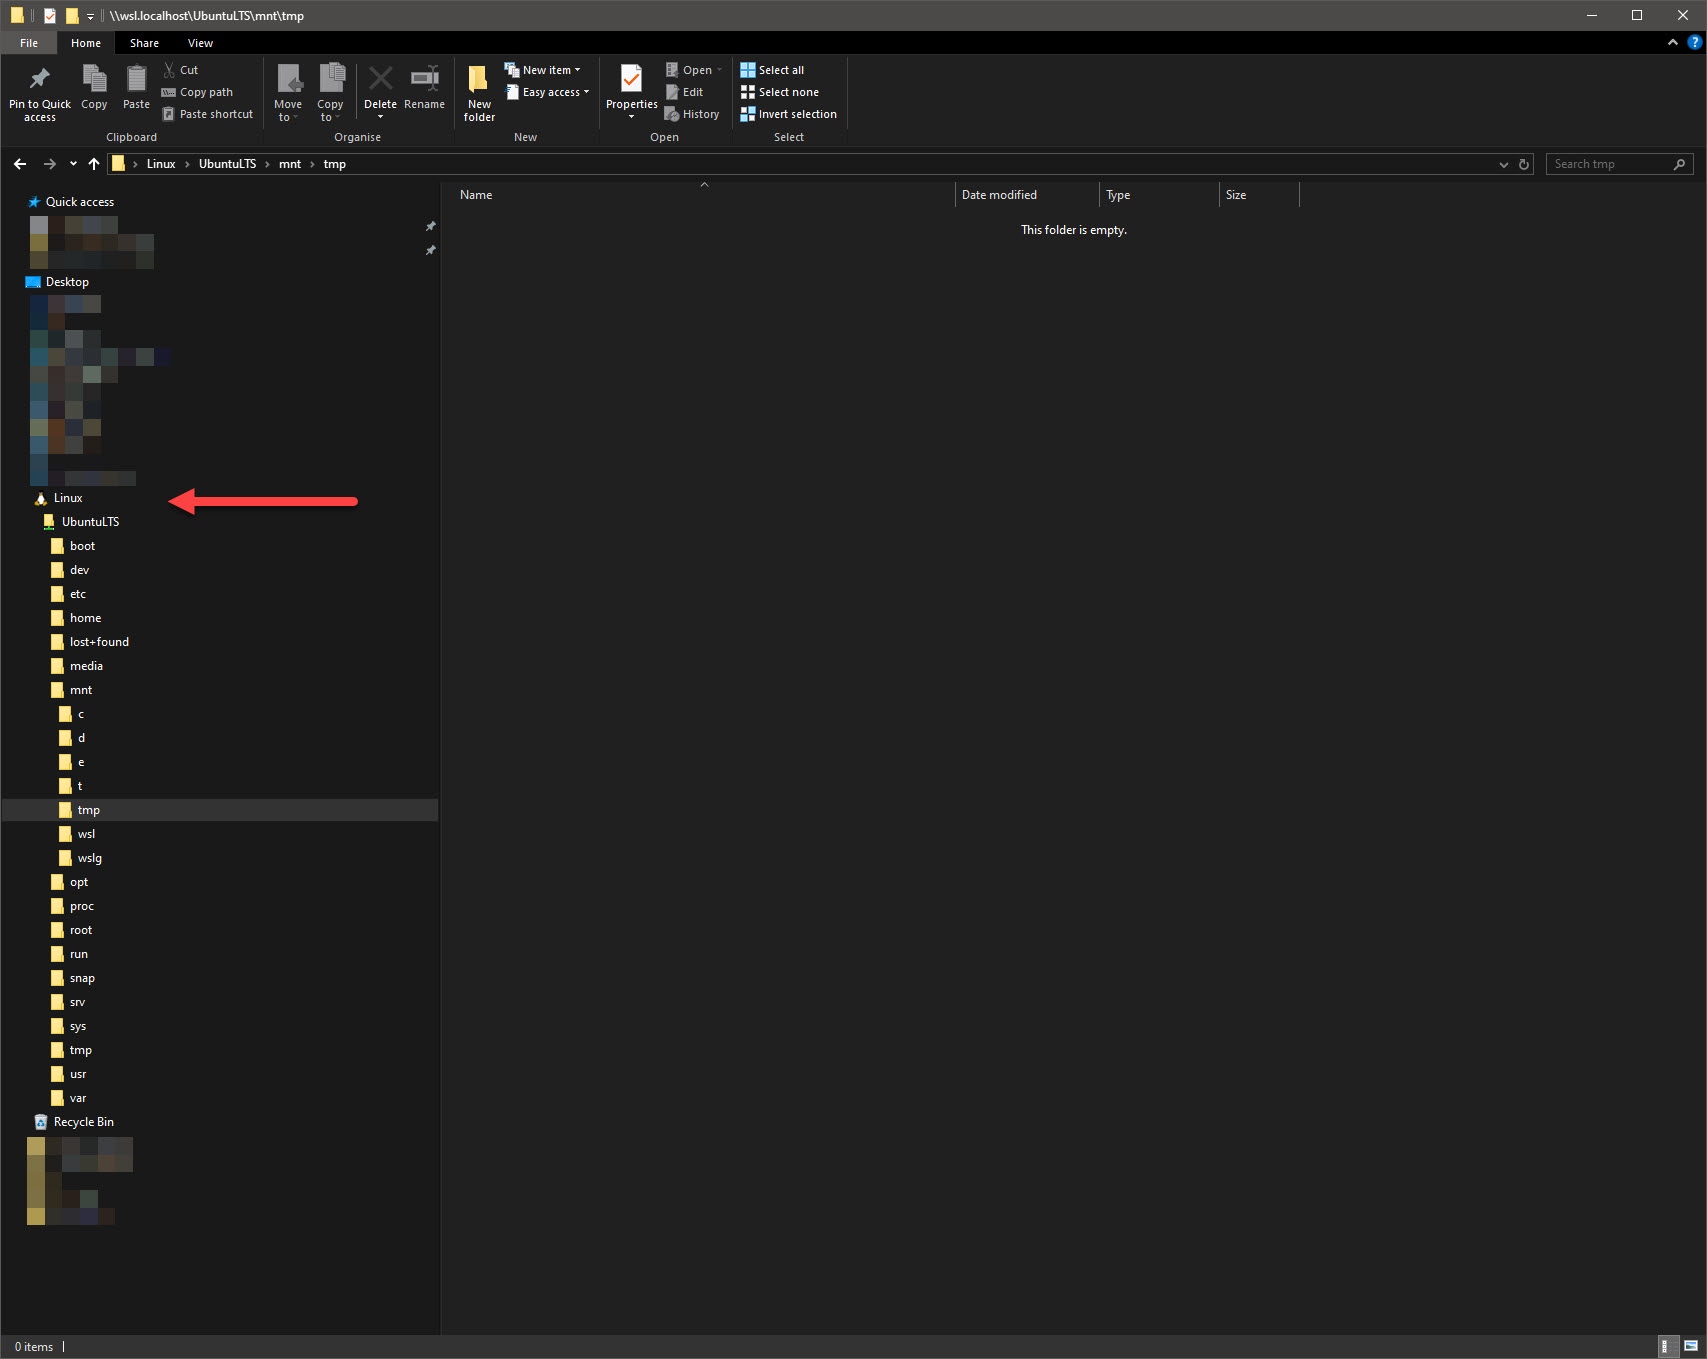
- access the files via Windows Explorer via the “Linux” file storage pass-through
ping
- quick reference for using ping as an “MTU” checker:
ping -f -l <size> <destination>- where:
sizeis the maximum packet size, which may be 8972 if maximum MTU in path is 9000 bytesdestinationis self explanatory (either resolvable host name or IP address)
Microsoft Hyper-V
Hyper-V VM Enhanced Session Enablement/Disablement
- for VMs that have the proper drivers installed, from administrator PowerShell:
- Set-VM “<VM Name>” -EnhancedSessionTransportType [ HvSocket | VMBus ]
- where:
- VMBus is the default transport (i.e. no enhanced session support)
- HvSocket uses sockets to enable enhanced session support
Setting/Forcing Resolution on VM
- (as found here) using an Administrator PowerShell:
set-vmvideo -vmname <VM NAME> -horizontalresolution:<H RESOLUTION> -verticalresolution:<V RESOLUTION> -resolutiontype single- e.g.
set-vmvideo -vmname VM1 -horizontalresolution:1920 -verticalresolution:1080 -resolutiontype single
- e.g.
- NOTE:
- Ubuntu will require the
linux-image-extra-virtualpackage- i.e.
apt install linux-image-extra-virtual
- i.e.
- if using
-resolutiontype maximuminstead of-resolutiontype single:- the guest VM, with the proper drivers, and dependent on the OS
- may still load with the “default” XGA resolution
- only switch to other resolutions as per per-user setting
- but will offer the full list of resolutions available up to the maximum set above
- the guest VM, with the proper drivers, and dependent on the OS
- Ubuntu will require the
Linux Shell/Command Prompt
Search
- find specifically named files containing a specific string
find . -type f -name "<pattern>" -exec grep -l '<string>' {} \;
- delete all files of a specific name/pattern in current and any sub-directories (without confirmation)
find . -name "<pattern>" -type f -delete
- protect all files of specific names/patterns in current and any sub-directories
find . \( -name "<pattern #1>" -o -name "<pattern #2>" \) -type f -exec chattr +i {} \;
- find all files containing a specific string
grep -r "<string>" <path>
Rebooting
- reboot into UEFI/BIOS from command line
systemctl reboot --firmware-setup
Mounting Devices/Remote Shares
- mount an SMB share
mount -t cifs //<server>/<share> <mount point> -o rw,username='<username>',password='<password>'
- mount an ISO
mount -o loop <ISO path> <mount point>
- mount a partition, assuming supported identifiable format (e.g. FAT32, Ext3/4)
mount /dev/sdxN <mount point>where:- x is the device letter typically starting from ‘a’
- N is the partition number starting from 0
- remount root partition read-write (if it was mounted read-only)
mount -o remount,rw /
Passwords
- changing logged in user’s password
passwd
- changing a specific user’s password
sudo passwd <user>
- deleting a specific user’s password
sudo passwd -d <user>
Hard Drive Security
Manipulates drive security as per ATA spec. If drive is external, the USB-to-SATA/PCIe bridge chipset must support/pass-through ATA security commands.
NOTE:
- In odd cases, a secure erase may (re)set the master password as “
NULL” or drive brand (e.g. “SEAGATE” or “ADATA” or “CRUCIAL“). - Read and understand this before attempting anything, particularly when attempting to manipulate master passwords!
- In all the references below,
<user/master flag>is either “u” or “m” denoting user or master password
- unlock a drive
hdparm --user-master <user/master flag> --security-unlock <password> /dev/sdX
- disable security
hdparm --user-master <user/master flag> --security-disable <password> /dev/sdX
- lock a drive
hdparm --user-master <user/master flag> --security-set-passwd <password> /dev/sdX
- secure erase a drive (which usually resets the master password also – see above NOTE)
- WARNING: Irreversible loss of data once command is accepted!
hdparm --user-master <user/master flag> --security-erase <password> /dev/sdXorhdparm --user-master <user/master flag> --security-erase-enhanced <password> /dev/sdX
journalctl
- review system journal in reverse order (earliest entries first)
journalctl -r
- clear journals, leaving only a 1 day’s worth (without changing the configuration permanently)
journalctl --flushjournalctl --rotatejournalctl --vacuum-time=1d
ip
- as the world moves away from the venerable
ifconfig, there is a need to continue to useip:- addresses:
- show IP addresses:
ip address(or simplyip a)
- add IP address:
ip address add <network>/<mask> dev <interface>
- remove IP address:
ip address del <network>/<mask> dev <interface>
- show IP addresses:
- routes:
- show routes:
ip route
- add default route:
ip route add default via <gateway>
- add specific route:
ip route add <network>/<mask> dev <interface>orip route add <network>/<mask> via <gateway>
- save (necessary to commit changes)
ip route save
- show routes:
- links:
- show links:
ip link
- bring link up or down:
ip link set <dev> [up|down]
- show links:
- addresses:
-
- MTUs:
- show MTUs:
ip link(and look for “mtu n“)
- show device maximum MTU:
ip -d link list dev <dev>
- setting MTU temporarily:
ip link set <dev> mtu <mtu size>
- show MTUs:
- MTUs:
-
-
-
/etc/network/interfaces:-
iface br0 inet manual
    mtu 9000
-
-
-
ping
- everyone knows the
pingcommand; but it is also useful as a “maximum MTU checker” (assuming ICMP network path exists i.e. ICMP is not firewalled anywhere between and including endpoints):ping -M do -s <size> <destination>- where:
sizeis the maximum packet size, which may be 8972 if maximum MTU in path is 9000 bytesdestinationis self explanatory (either resolvable host name or IP address)
Environment Variables (All Users)
- to add environment variables for all users, either:
- place <key>=<value> pairs in
/etc/environment- WARNING: this file is not a script, so do not attempt to use “
<key>=$(<command>)” execution – it will have unexpected results
- WARNING: this file is not a script, so do not attempt to use “
- assuming use of Bourne shells (like
/usr/bin/bash), create a/etc/profile.d/<some name>.shand place one or more (as required)export <key>=<value>pairs – you can use command execution here i.e. “<key>=$(<command>)“
- place <key>=<value> pairs in
Power Management
- to check current system-wide configuration, look at:
/etc/systemd/sleep.conf/etc/systemd/sleep.conf.d/*systemctl status sleep.target suspend.target hibernate.target hybrid-sleep.targetloginctl show-session | grep -E "^(IdleAction|BlockInhibited|DelayInhibited|Handle)"
Temperature Monitoring
- install the modules that can read the sensors:
apt install lm-sensors
- add drive sensors
modprobe drivetemp- NOTE: to make it load automatically every boot:
echo drivetemp | sudo tee -a /etc/modules-load.d/drivetemp
- NOTE: to make it load automatically every boot:
- displaying sensor information:
sensors
Driver Management
- listing devices and kernel modules used
lspci -k
- listing drivers:
lsmod <module>
- unloading a driver:
rmmod <module>
- loading a driver:
insmod <module>(no dependency resolution), ormodprobe -a <module>
dkms Driver Management
- to ensure drivers are re-built whenever the kernel is changed, it is recommended to utilise the Dynamic Kernel Module Support aka
dkmssystem (credit)- ensure prerequisite libraries and kernel headers are installed
apt install build-essential dkms gcc make linux-headers-$(uname -r)
- move sources to
/usr/src/ - create a
dkms.conffile, e.g.:
- ensure prerequisite libraries and kernel headers are installed
MAKE="BUILD_KERNEL=${kernelver} make -C src/ KERNELDIR=/lib/modules/${kernelver}/build"
CLEAN="make -C src/ clean"
PACKAGE_NAME="<module>-dkms"
PACKAGE_VERSION="<version>"
BUILT_MODULE_NAME="<module>"
BUILT_MODULE_LOCATION=src/
DEST_MODULE_LOCATION="<destination>"
AUTOINSTALL="yes"-
-
- where:
- module is the module name (e.g. “
ixgbe“) - version is the module version (e.g. “
6.2.5“) - destination is the location where the built .ko driver will be placed (e.g. “
/updates/drivers/net/ethernet/intel/ixgbe/“; example taken from sourceMakefileas if using plainmake install)
- module is the module name (e.g. “
- where:
- run the
dkmscommands:dkms add <module>/<version>dkms build <module>/<version>dkms install <module>/<version>
-
- fixing “
Error! Could not locate dkms.conf file” errors (credit)- locate missing dkms.conf file
for i in /var/lib/dkms/*/[^k]*/source; do [ -e "$i" ] || echo "$i";done
- if driver has been removed, delete the entire directory
- locate missing dkms.conf file
Linux GUI
Switching to Text Console and Back
- to drop to a text console
tty, press the following key combination:CTRL+ALT+F2(i.e.tty2, or otherFncombinations for other terminals) - to get back into the UI, switch back to
tty7by pressing the following key combination:CTRL+ALT+F7
Changing Resolutions and Display Modes via Command Line
- refer here
FreeBSD Shell/Command Prompt
ifconfig
- although deprecated in favour of
ip,ifconfigis still required on FreeBSD (and therefore, by extension, pfSense) - MTUs
- show the MTU
ifconfig <device>
- set the MTU (temporarily)
ifconfig <device> mtu 9000
- setting the MTU (permanently)
- edit
/etc/rc.confand add “mtu 9000” to the appropriateifconfig_<device>line, e.g.:ifconfig_enp0s0="inet 1.2.3.4 netmask 255.255.0.0 mtu 9000"
- WARNING: for pfSense, please use the respective “Interfaces” > “<device>” page to explicitly set the MTU
- edit
- show the MTU
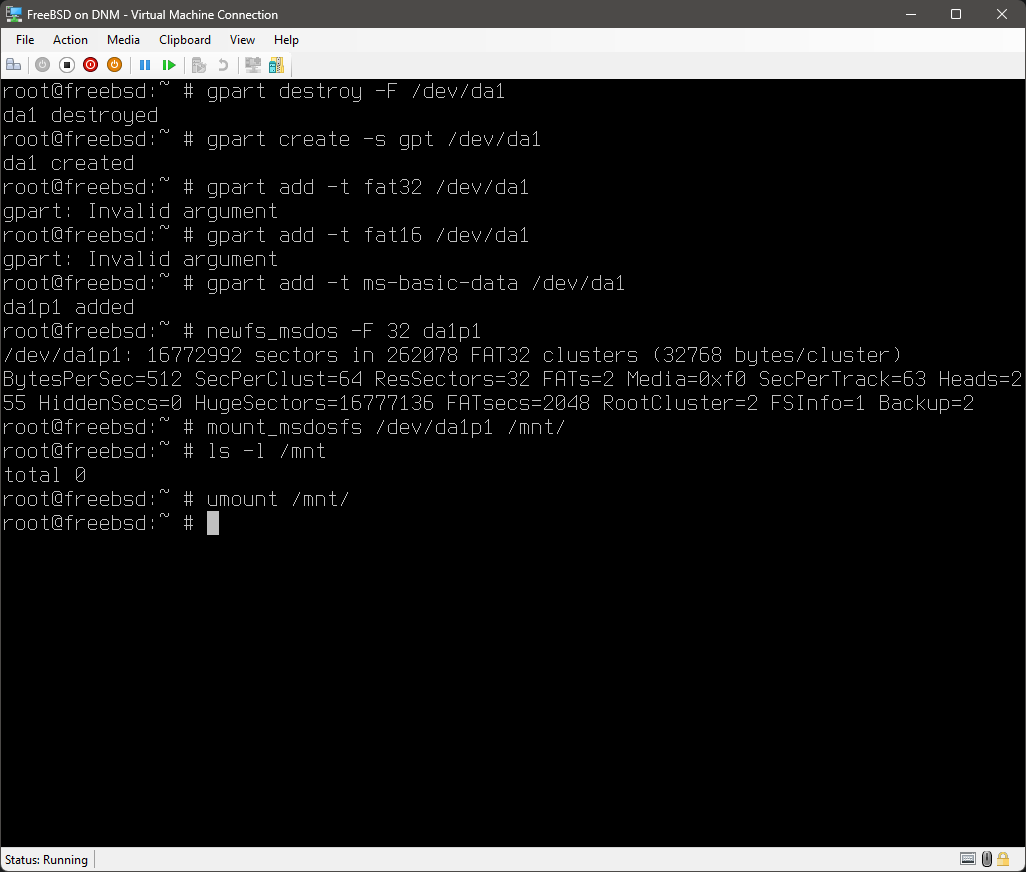
Handling Partitions with gpart
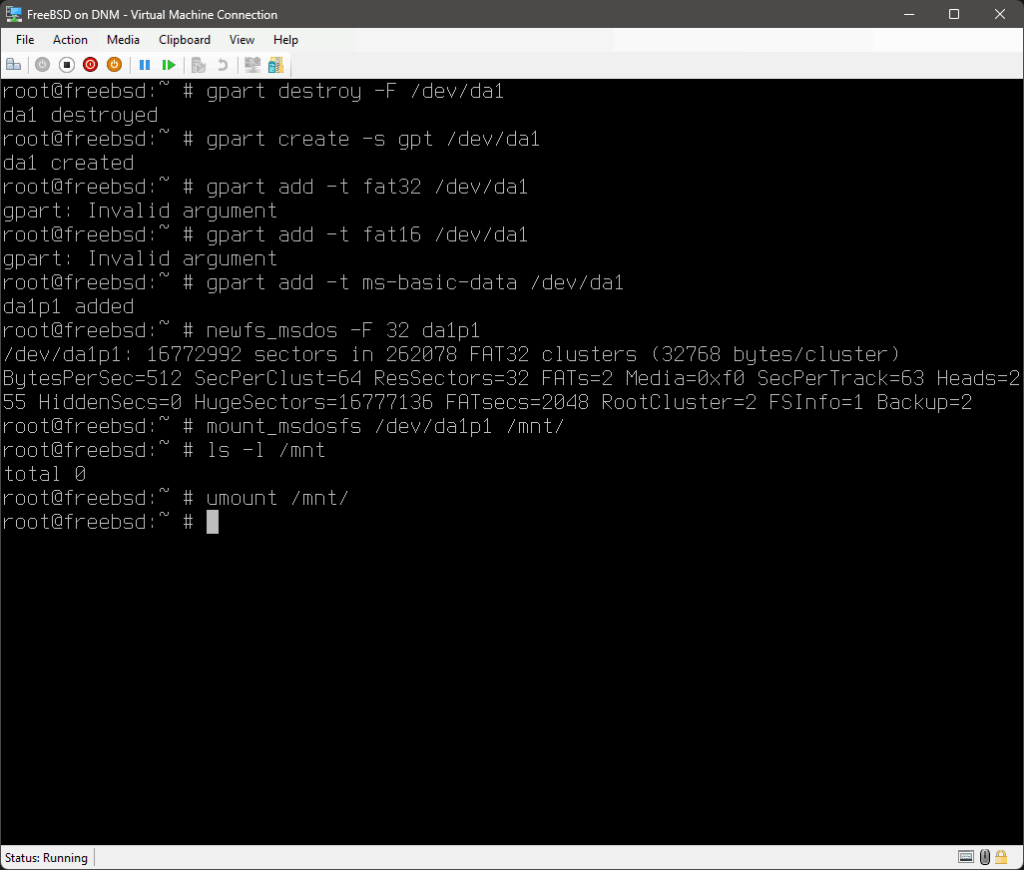
- wiping a disk:
gpart destroy -F /dev/<device>
- creating a GPT or MBR disk:
gpart create -s [GPT|MBR] /dev/<device>
- adding a partition:
gpart add -t <partition type> -s <size>[M|G] -l <label> /dev/<device>- where
<partition type>is one of the options listed here – although it must be noted thatfat16,fat32does not work
- where
- formatting a partition with FAT16/32 or UFS2:
newfs_msdos -F [16|32] <partition>newfs -O 2 <partition>
- mounting a FAT32 partition:
mount_msdosfs /dev/<partition> <mount point>- note that
mount -t msdosfssimply calls/sbin/mount_msdosfs
- note that
Python
- generate TOTP given seed:
python -c "import pyotp;print(pyotp.TOTP('<seed>').now())"
pyenv
Python version management tends to be a PitA, so here’s some quick cheats:
- install
pyenv:apt install pyenvorcurl -fsSL https://pyenv.run | bash
- install pyenv-virtualenv:
git clone https://github.com/pyenv/pyenv-virtualenv.git $(pyenv root)/plugins/pyenv-virtualenv
- list available python versions for
pyenv:pyenv install --list
- install specific python version for
pyenv:pyenv install <version>
- create specific
virtualenvwith specific python version:pyenv virtualenv <version> <venv name>
- show
pyenvversions available:pyenv versions
- set the current directory to use a specific
virtualenv:pyenv local <venv name>
- reset the current directory to use default/system version:
pyenv local system
- set “global” python version:
pyenv global <version>
ffmpeg
- extract specific portions of video w/o re-encoding:
ffmpeg -i <input> -ss <seek timestamp> -t <duration> <output>-ss <seek timestamp>: the timestamp (inh:m:s.ssformat) to start from-t <duration>: the duration of the extracted clip (inh:m:s.ssformat)- note that multiple
-ss <seek timestamp> -t <duration> <output>can be appended to do multiple extractions in one pass
- remove embedded closed captions from video stream (e.g. example
ffprobeoutput below):ffmpeg -i <input> -c copy -bsf:v 'filter_units=remove_types=6' <output>Stream #0:0(und): Video: h264 (High) (avc1 / 0x31637661), yuv420p, 1920x1072 [SAR 1:1 DAR 120:67], Closed Captions, 2150 kb/s, 23.98 fps, 23.98 tbr, 24k tbn, 47.95 tbc (default)Metadata:handler_name : VideoHandlervendor_id : [0][0][0][0]
- removing or re-ordering audio and subtitle tracks:
ffmpeg -i <input> -map 0:v:0 -map 0:a:<index> -map 0:s:<index> -c copy <output>(assuming only single input and single video stream, all<source>entries for the-map <source>:<type>:<index>parameters is always0)-map 0:a:<index>: zero-based index of the audio track (i.e. even if multiple audio streams exist, and/or the first audio track isstream#0:n, the first audio track’s index is still “0“); multiple entries can be used, with the new order based on the order the -map parameter appears-map 0:s:<index>: zero-based index of the subtitle track (i.e.even if multiple subtitle streams exist, and/or the first subtitle track isstream#0:n, the first audio track’s index is still “0“); multiple entries can be used, with the new order based on the order the-mapparameter appears- any unmapped streams will be omitted in the output (i.e. if you left out the
-map 0:v:0, there will be no video stream)
- removing or switching default audio and subtitle tracks:
ffmpeg -i <input> -c copy <output> -dispositions:<type>:<index> 0 -dispositions:<type>:<index> default <output>-dispositions:<type>:<index> 0: remove stream<index>as the default stream for<type>-dispositions:<type>:<index> default: set stream<index>as the default stream for<type>- note that the
<index>is based on the output streams order (e.g. if placed after other-mapparameters)
- merging a single separate audio and video stream:
ffmpeg -i <audio stream input> -i <video stream input> -c copy <output>- note that this assumes both streams have the same duration, and each input file only has one audio and video stream; if there are more, or if there are other streams (e.g. subtitles), these will all be merged – if only specific streams are required, use the
-mapparameters
- note that this assumes both streams have the same duration, and each input file only has one audio and video stream; if there are more, or if there are other streams (e.g. subtitles), these will all be merged – if only specific streams are required, use the
- changing/deleting the metadata on entire file and individual streams:
ffmpeg -i <input> -metadata <tag>="<value>" -metadata <tag>=""-map 0:v:0 -metadata:s:v:0 <tag>="<value>" -map 0:a:0 -metadata:s:a:0 <tag>="<value>" -map 0:s:0 -c copy <output>- note that in the above example format, only the main metadata, video and audio streams “
0” require metadata changes/deletions, i.e. any-metadataparam eters apply only to the preceding-mapand if placed before any-map, applies to the main metadata
- note that in the above example format, only the main metadata, video and audio streams “
- concatenating one or more separate tracks without re-encoding, assuming all inputs are in directory list display order and have the same encoding, dimensions, etc.:
- build the file list with the prefix string “
file“, followed by the actual file name in single quotes (example here showing MP4 files):(for %i in (*.mp4) do @echo file '%i') > input_list.txt
- use the in-built concatenation filter:
ffmpeg -safe 0 -f concat -i input_list.txt -c copy <MP4 output filename with extension>
- build the file list with the prefix string “
- concatenating one or more separate files with re-encoding, assuming all inputs have the same dimensions, etc.:
- use the mapping functionality, stating all encoding parameters as required, noting the
n=nparameter stating the number of input files:ffmpeg -i <input1> -i <input2> -i <input3> \
-filter_complex "[0:v] [0:a] [1:v] [1:a] [2:v] [2:a] \
concat=n=3:v=1:a=1 [v] [a]" \

-map "[v]" -map "[a]" \
<encoding parameters> <output file with extension>
- add tracks (like
[s]subtitles), or remove tracks (e.g. removing[a]entries where there is no audio required in output) as necessary.
- use the mapping functionality, stating all encoding parameters as required, noting the
